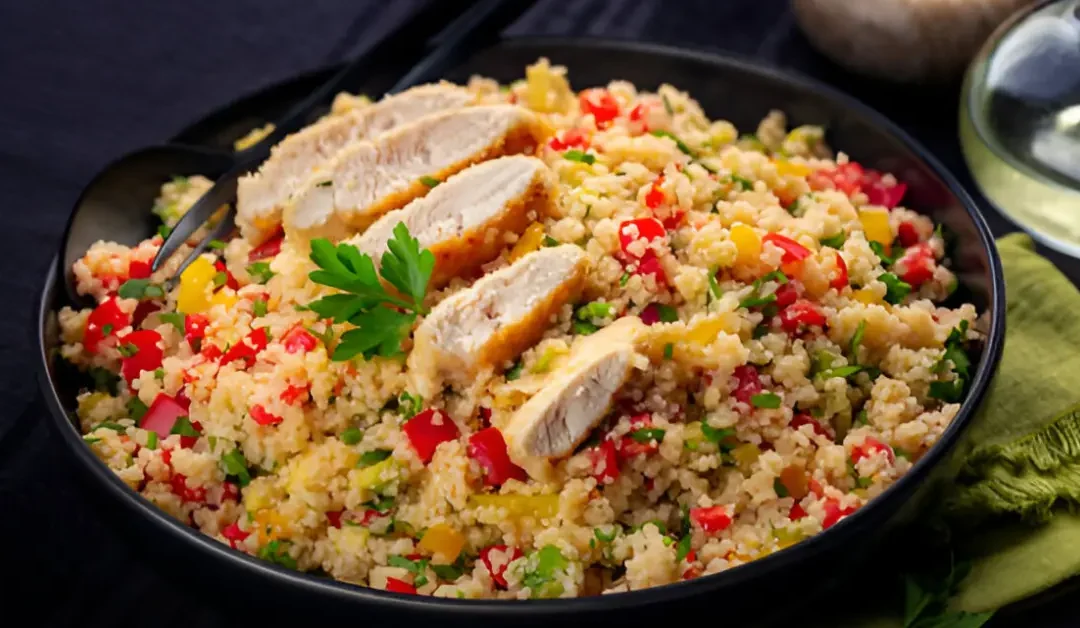
Easy Chicken and Couscous Recipe: A 30-Minute Mediterranean Feast

Easy Chicken and Couscous Recipe: A 30-Minute Mediterranean Feast

Craving something different for dinner tonight? Let me introduce you to my favorite weeknight wonder: a vibrant chicken and couscous dish that’ll transport your taste buds straight to the Mediterranean coast.

As someone who’s been cooking this dish for years, I can promise you one thing – it’s about to become your new go-to meal.

Why You’ll Love This Recipe

You know those evenings when you’re standing in front of your open fridge, wondering what to make for dinner? Been there, done that! That’s exactly why I fell in love with this chicken and couscous recipe. It’s the perfect balance of “looks fancy enough for company” and “easy enough for a Tuesday night.”

The best part? While your chicken is cooking, the couscous practically makes itself. I mean, how many dishes can you say that about? Plus, it’s endlessly customizable – something my picky eaters definitely appreciate!

Ingredients (Serves 4)

For the Chicken:

  • 4 boneless, skinless chicken breasts
  • 2 tablespoons olive oil
  • 2 teaspoons paprika
  • 1 teaspoon ground cumin
  • 1 teaspoon garlic powder
  • Salt and pepper to taste
  • 1 lemon, juiced

For the Couscous:

  • 2 cups couscous
  • 2½ cups chicken broth
  • 2 tablespoons butter
  • 1 cup mixed vegetables (I use carrots, peas, and corn)
  • ¼ cup fresh parsley, chopped
  • ¼ cup fresh mint, chopped
  • ½ cup toasted almonds (optional)

Kitchen Equipment You’ll Need

  • Large skillet
  • Medium saucepan
  • Measuring cups and spoons
  • Sharp knife
  • Cutting board

Step-by-Step Instructions

Preparing the Chicken

  1. In a bowl, mix paprika, cumin, garlic powder, salt, and pepper. Trust me, this spice blend is a game-changer!
  2. Pat your chicken breasts dry (this is crucial for getting that perfect golden crust) and season generously with the spice mixture.
  3. Heat olive oil in a large skillet over medium-high heat. Once it’s shimmering (but not smoking!), add your chicken.
  4. Cook for 6-7 minutes on each side, or until golden brown and cooked through. The internal temperature should reach 165°F (74°C).

Making the Perfect Couscous

Here’s where the magic happens! While your chicken is cooking:

  1. Bring the chicken broth to a boil in a medium saucepan.
  2. Add butter and stir until melted.
  3. Add couscous, give it a quick stir, cover, and remove from heat.
  4. Let it sit for 5 minutes – no peeking! This is when the couscous absorbs all that flavorful broth.
  5. Fluff with a fork and stir in your vegetables, herbs, and toasted almonds if using.

Pro Tips from My Kitchen to Yours

  • Don’t Skip the Rest: Let your chicken rest for 5 minutes before slicing. This keeps all those delicious juices inside where they belong.
  • Broth is Better: Using chicken broth instead of water for your couscous adds an extra layer of flavor that makes all the difference.
  • Herb It Up: Fresh herbs are non-negotiable here. They transform this dish from good to “can I have seconds?”

Make It Your Own

The beauty of this recipe is how easily you can customize it. Here are some of my favorite variations:

  • Swap chicken breasts for thighs for even more flavor
  • Add roasted cherry tomatoes and feta cheese for a Greek twist
  • Stir in some harissa paste for a spicy North African kick
  • Make it vegetarian by using chickpeas instead of chicken

Storage and Leftovers

This dish keeps beautifully in the fridge for up to 3 days. I often make extra for lunch the next day – it’s just as delicious cold! Just store the chicken and couscous separately in airtight containers.

Perfect Pairings

Want to make it a complete meal? Here’s what I love serving alongside:

  • A simple cucumber and tomato salad
  • Grilled Mediterranean vegetables
  • A glass of crisp white wine (I’m partial to a Pinot Grigio with this)

Final Thoughts

There’s something incredibly satisfying about putting together a meal that’s both nutritious and delicious, isn’t there? This chicken and couscous recipe has saved my weeknight dinner plans more times than I can count, and I hope it does the same for you.

Recipe originally developed in my kitchen after countless Mediterranean-inspired experiments. Perfect for busy families, meal prep enthusiasts, and anyone looking to add a delicious, nutritious meal to their repertoire.

You May Also Like

No Results Found

The page you requested could not be found. Try refining your search, or use the navigation above to locate the post.

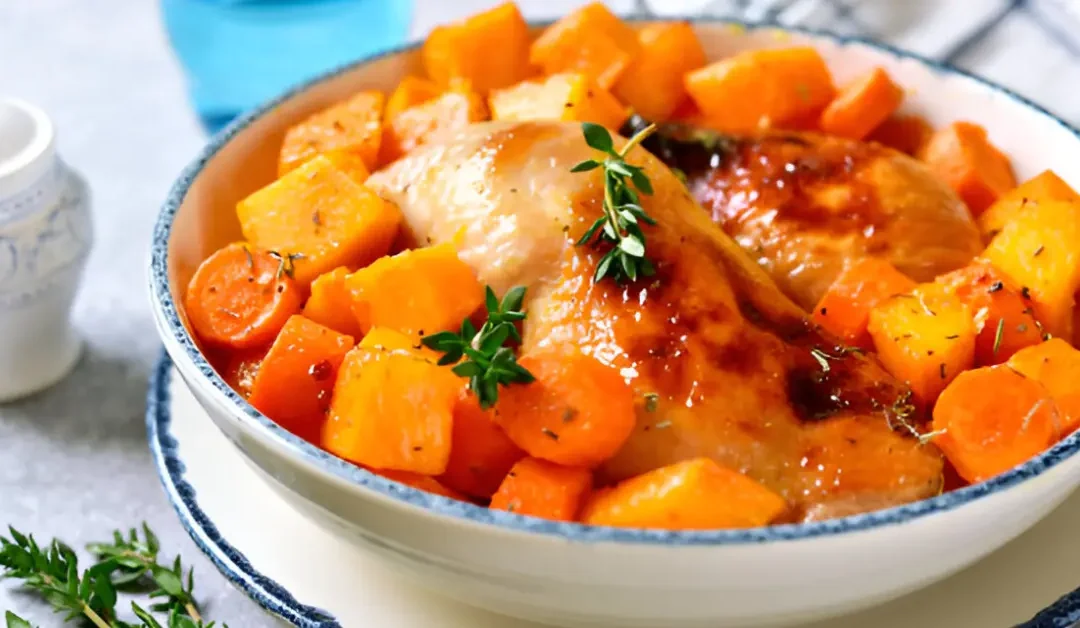
Chicken and Butternut Squash Recipe

Chicken and Butternut Squash Recipe

As the leaves turn golden and the air gets crisp, there’s nothing quite like a comforting, hearty meal to warm you up. Enter the chicken and butternut squash recipe—a perfect blend of savory chicken and sweet, nutty butternut squash that’s sure to become a fall favorite.

Whether you’re looking for a cozy dinner for two or a crowd-pleaser for a family gathering, this dish has got you covered. Let’s dive into the world of chicken and butternut squash, where flavors mingle and comfort food reigns supreme.

The Magic of Butternut Squash

Butternut squash is more than just a pretty face in the world of fall vegetables. It’s packed with vitamins, fiber, and a delightful sweetness that pairs beautifully with chicken. Plus, it’s incredibly versatile—you can roast it, puree it, or even use it as a base for soups and stews.

Nutritional Powerhouse

Butternut squash is a nutritional powerhouse, loaded with vitamins A and C, potassium, and fiber. It’s low in calories and high in flavor, making it an excellent choice for health-conscious foodies.

How to Pick the Perfect Squash

When selecting a butternut squash, look for one that’s firm, heavy for its size, and has a matte, even-colored skin. Avoid any with soft spots or bruises.

Chicken and Butternut Squash Recipe Ideas

Now that we’ve sung the praises of butternut squash, let’s get cooking! Here are some fantastic chicken and butternut squash recipes to try:

1. Creamy Butternut Squash Butter Chicken

This Indian-inspired dish combines the rich flavors of butter chicken with the sweetness of butternut squash. Creamy coconut milk and warming spices make this a cozy, comforting meal perfect for chilly evenings.

Ingredients:

  • 1 lb boneless, skinless chicken breasts, cut into bite-sized pieces
  • 1 medium butternut squash, peeled and cubed
  • 1 onion, finely chopped
  • 2 cloves garlic, minced
  • 1 tbsp grated ginger
  • 1 can (14 oz) coconut milk
  • 2 tbsp tomato paste
  • 1 tsp garam masala
  • 1 tsp ground cumin
  • 1 tsp paprika
  • 1/2 tsp turmeric
  • 1/2 tsp cayenne pepper (optional)
  • Salt and pepper to taste
  • 2 tbsp olive oil
  • Fresh cilantro for garnish

Instructions:

  1. Heat olive oil in a large skillet over medium heat. Add chicken and cook until browned. Remove from skillet and set aside.
  2. In the same skillet, add onion, garlic, and ginger. Sauté until softened.
  3. Add butternut squash, coconut milk, tomato paste, and spices. Stir well to combine.
  4. Return chicken to the skillet, reduce heat to low, and simmer for 20-25 minutes, or until squash is tender and chicken is cooked through.
  5. Garnish with fresh cilantro and serve over steamed rice or with naan bread.

2. One Pan Maple Dijon Chicken and Butternut Squash

This one-pan wonder is perfect for busy weeknights. Maple syrup and Dijon mustard create a sweet and tangy glaze that complements the chicken and squash beautifully.

Ingredients:

  • 4 boneless, skinless chicken thighs
  • 1 medium butternut squash, peeled and cubed
  • 1 small red onion, sliced
  • 2 cups Brussels sprouts, halved
  • 2 tbsp maple syrup
  • 1 tbsp Dijon mustard
  • 2 tbsp olive oil
  • Salt and pepper to taste
  • Fresh thyme for garnish

Instructions:

  1. Preheat oven to 400°F (200°C).
  2. In a small bowl, mix maple syrup, Dijon mustard, and 1 tbsp olive oil.
  3. Place chicken thighs, butternut squash, onion, and Brussels sprouts on a baking sheet. Drizzle with the maple-Dijon mixture and remaining olive oil. Toss to coat.
  4. Season with salt and pepper.
  5. Roast for 25-30 minutes, or until chicken is cooked through and squash is tender.
  6. Garnish with fresh thyme and serve hot.

3. Chicken and Butternut Squash Gratin

This creamy gratin is the epitome of comfort food. Leftover roast chicken, leeks, and butternut squash are combined in a creamy sauce, topped with crunchy ciabatta pieces and cheese, then baked to golden perfection.

Ingredients:

  • 2 cups cooked chicken, shredded
  • 1 medium butternut squash, peeled and thinly sliced
  • 1 leek, thinly sliced
  • 1 onion, finely chopped
  • 1 cup heavy cream
  • 1/2 cup chicken broth
  • 1 tsp dried thyme
  • 1 cup grated Gruyère cheese
  • 1 cup ciabatta bread, torn into pieces
  • Salt and pepper to taste
  • 2 tbsp olive oil

Instructions:

  1. Preheat oven to 375°F (190°C).
  2. In a large skillet, heat olive oil over medium heat. Add onion and leek, sauté until softened.
  3. Add butternut squash, chicken broth, and thyme. Cook until squash is tender.
  4. Stir in heavy cream and cooked chicken. Season with salt and pepper.
  5. Transfer mixture to a baking dish. Top with ciabatta pieces and Gruyère cheese.
  6. Bake for 20-25 minutes, or until golden and bubbly.

4. Sheet-Pan Honey-Garlic Chicken and Butternut Squash

This sheet-pan dinner is for all the sweet-and-savory fans out there. Honey, garlic, and red pepper flakes create a bold, flavorful glaze that’s sure to please.

Ingredients:

  • 4 boneless, skinless chicken breasts
  • 1 medium butternut squash, peeled and cubed
  • 4 tbsp honey
  • 2 tbsp lemon juice
  • 2 cloves garlic, minced
  • 1/2 tsp red pepper flakes
  • 3 tbsp olive oil
  • Salt and pepper to taste

Instructions:

  1. Preheat oven to 450°F (230°C).
  2. In a small bowl, mix 3 tbsp honey, lemon juice, garlic, and red pepper flakes.
  3. In a medium bowl, mix butternut squash, 2 tbsp olive oil, 3/4 tsp salt, and 3 tbsp of the honey mixture. Toss to coat.
  4. Place squash mixture on a baking sheet.
  5. Season chicken with remaining salt and pepper. Place chicken on the baking sheet with the squash. Brush chicken with 1 tbsp of the honey mixture.
  6. Roast for 15 minutes. Brush chicken with remaining honey mixture and roast for an additional 10-15 minutes, or until chicken is cooked through and squash is tender.

Tips for Perfect Chicken and Butternut Squash Dishes

Prepping Butternut Squash

Prepping butternut squash can be a bit of a chore, but it’s worth the effort. Here are some tips to make the process easier:

  1. Microwave Method: Poke the squash with a fork and microwave for 2-3 minutes to soften the skin, making it easier to peel.
  2. Vegetable Peeler: Use a sturdy vegetable peeler to remove the skin.
  3. Sharp Knife: A sharp chef’s knife will make cutting the squash much easier.

Cooking Chicken

To ensure perfectly cooked chicken, follow these tips:

  1. Even Thickness: Pound chicken breasts to an even thickness to ensure they cook evenly.
  2. Temperature Check: Use a meat thermometer to check the internal temperature. Chicken is done when it reaches 165°F (74°C).
  3. Resting Time: Let the chicken rest for a few minutes before slicing to allow the juices to redistribute.

Conclusion

The chicken and butternut squash recipe is a match made in culinary heaven. Whether you’re craving a creamy, comforting dish or a sweet and savory delight, there’s a recipe here for you.

So, grab your apron, gather your ingredients, and let’s get cooking! Don’t forget to share your creations and tag us on social media—we’d love to see your culinary masterpieces. Happy cooking!

You May Also Like

No Results Found

The page you requested could not be found. Try refining your search, or use the navigation above to locate the post.
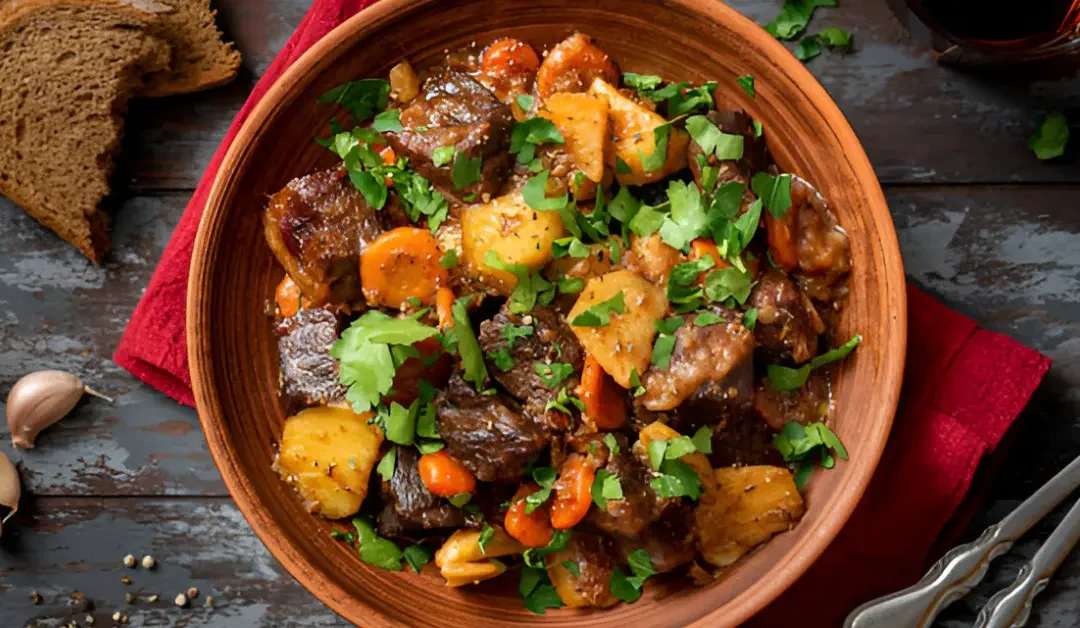
Easy Healthy Beef Mince Recipes: Delicious and Nutritious Meal Ideas

Easy Healthy Beef Mince Recipes: Delicious and Nutritious Meal Ideas

Picture this: a sizzling pan filled with aromatic beef mince, cooked to perfection with a blend of herbs, spices, and vegetables. The scent alone is enough to make your mouth water. But here’s the twist—these recipes are not only delicious but also incredibly healthy.

Whether you’re looking to cut down on calories, boost your protein intake, or simply enjoy a wholesome meal, these easy healthy beef mince recipes are your answer. Let’s dive into a world of flavorful, nutritious dishes that will become your new go-to favorites!

Why Choose Healthy Beef Mince Recipes?

Before we get into the recipes, let’s talk about why healthy beef mince dishes should be a staple in your kitchen.

  1. Nutritious: Beef mince is packed with protein, iron, and essential vitamins, making it a great choice for a balanced diet.
  2. Versatile: From stir-fries to meatballs, beef mince can be used in a variety of dishes, ensuring you never get bored.
  3. Easy to Prepare: Most beef mince recipes are quick and simple, perfect for busy weeknights or meal prep.

Top 5 Easy Healthy Beef Mince Recipes

1. Classic Beef and Vegetable Stir-Fry

Ingredients:

  • 1 lb lean beef mince
  • 2 cups mixed vegetables (bell peppers, broccoli, carrots)
  • 2 cloves garlic, minced
  • 1 tbsp soy sauce
  • 1 tbsp olive oil
  • Salt and pepper to taste

Instructions:

  1. Heat olive oil in a large pan over medium heat.
  2. Add beef mince and cook until browned, about 5 minutes.
  3. Add garlic and vegetables, stir-fry for another 5 minutes until vegetables are tender.
  4. Season with soy sauce, salt, and pepper.
  5. Serve hot with a side of brown rice or quinoa.

2. Healthy Beef Meatballs

Ingredients:

  • 1 lb lean beef mince
  • 1/2 cup breadcrumbs
  • 1 egg
  • 1 small onion, finely chopped
  • 2 cloves garlic, minced
  • 1 tbsp dried oregano
  • Salt and pepper to taste

Instructions:

  1. Preheat oven to 400°F (200°C).
  2. In a bowl, combine beef mince, breadcrumbs, egg, onion, garlic, oregano, salt, and pepper.
  3. Form the mixture into small meatballs.
  4. Place meatballs on a baking sheet lined with parchment paper.
  5. Bake for 20-25 minutes until golden brown and cooked through.
  6. Serve with a side of steamed vegetables or a fresh salad.

3. Beef and Lentil Soup

Ingredients:

  • 1 lb lean beef mince
  • 1 cup green lentils
  • 1 onion, chopped
  • 2 carrots, chopped
  • 2 celery stalks, chopped
  • 4 cups beef broth
  • 1 can diced tomatoes
  • 1 tsp dried thyme
  • Salt and pepper to taste

Instructions:

  1. In a large pot, cook beef mince until browned. Drain excess fat.
  2. Add onion, carrots, and celery. Cook until softened, about 5 minutes.
  3. Add lentils, beef broth, diced tomatoes, thyme, salt, and pepper.
  4. Bring to a boil, then reduce heat and simmer for 25-30 minutes until lentils are tender.
  5. Serve hot with a side of crusty bread.

4. Beef and Quinoa Stuffed Bell Peppers

Ingredients:

  • 1 lb lean beef mince
  • 1 cup cooked quinoa
  • 4 large bell peppers, halved and seeds removed
  • 1 small onion, finely chopped
  • 1 can diced tomatoes
  • 1 tsp dried oregano
  • Salt and pepper to taste
  • 1/2 cup shredded cheese (optional)

Instructions:

  1. Preheat oven to 375°F (190°C).
  2. In a pan, cook beef mince until browned. Drain excess fat.
  3. Add onion and cook until softened.
  4. Stir in quinoa, diced tomatoes, oregano, salt, and pepper.
  5. Spoon the mixture into bell pepper halves.
  6. Place stuffed peppers in a baking dish, cover with foil, and bake for 30 minutes.
  7. Remove foil, sprinkle with cheese (if using), and bake for another 10 minutes until cheese is melted and peppers are tender.

5. Beef and Spinach Skillet

Ingredients:

  • 1 lb lean beef mince
  • 4 cups fresh spinach
  • 1 small onion, finely chopped
  • 2 cloves garlic, minced
  • 1 can diced tomatoes
  • 1 tsp dried basil
  • Salt and pepper to taste

Instructions:

  1. In a large skillet, cook beef mince until browned. Drain excess fat.
  2. Add onion and garlic, cook until softened.
  3. Stir in spinach and cook until wilted.
  4. Add diced tomatoes, basil, salt, and pepper. Simmer for 10 minutes.
  5. Serve hot with a side of whole grain pasta or crusty bread.

Pro Tips for Healthy Beef Mince Recipes

  • Choose Lean Mince: Opt for lean beef mince to reduce fat content and keep your dishes healthier.
  • Add Vegetables: Incorporate a variety of vegetables to boost nutritional value and add flavor.
  • Use Herbs and Spices: Enhance the taste of your dishes with herbs and spices instead of relying on excess salt or fat.

Frequently Asked Questions

Q: Can I freeze beef mince recipes?

A: Yes! Most beef mince recipes can be frozen for up to 3 months. Simply store in airtight containers and thaw in the refrigerator overnight before reheating.

Q: What are some healthy sides to serve with beef mince dishes?

A: Healthy sides include steamed vegetables, quinoa, brown rice, or a fresh salad. These options complement the flavors of beef mince dishes and add extra nutrients to your meal.

Q: Can I substitute ground turkey for beef mince?

A: Absolutely! Ground turkey is a leaner alternative and can be used in most beef mince recipes. Just adjust the cooking time as turkey may cook slightly faster.

Conclusion

Healthy beef mince recipes are a game-changer for anyone looking to enjoy delicious, nutritious meals without compromising on flavor. With these easy and versatile dishes, you can whip up a wholesome dinner in no time. So, grab your apron, gather your ingredients, and get ready to cook up a storm. Your taste buds (and your body) will thank you!

You May Also Like

No Results Found

The page you requested could not be found. Try refining your search, or use the navigation above to locate the post.
Mastering Easy Italian Beef Recipe

Mastering Easy Italian Beef Recipe

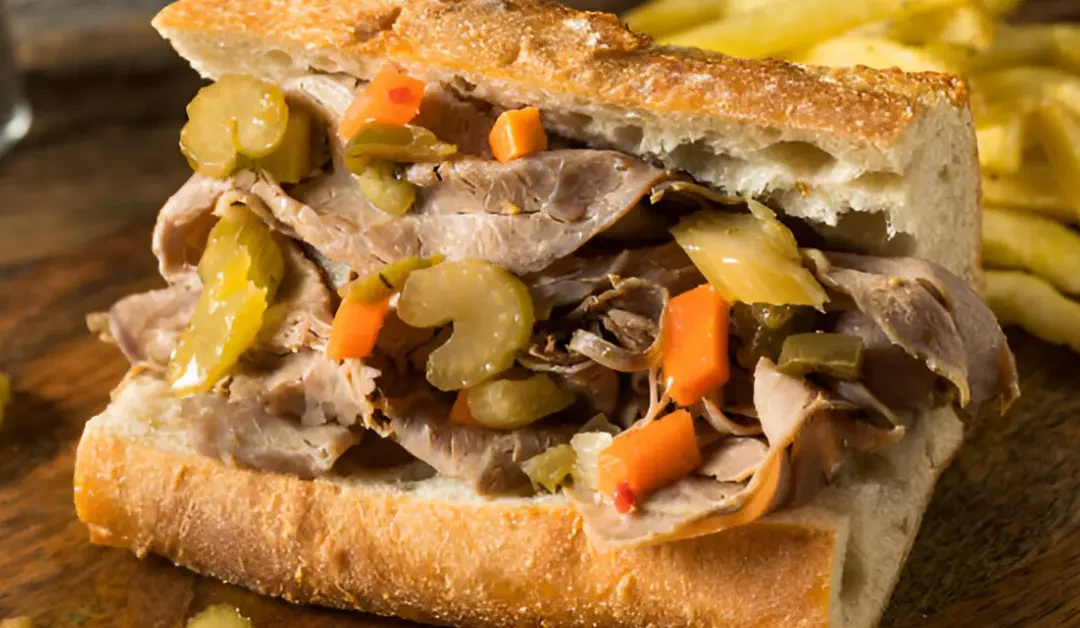
Picture this: tender, juicy beef, slow-cooked to perfection, served on a crusty roll with a tangy, flavorful sauce. Sounds like a dream? Welcome to the world of easy Italian beef! This classic dish is a favorite for a reason—it’s delicious, comforting, and surprisingly simple to make at home.

Whether you’re a seasoned cook or a kitchen novice, this guide will walk you through creating the ultimate Italian beef that will impress your taste buds and your dinner guests. Let’s dive in!

Why Italian Beef?

Before we get into the recipe, let’s talk about why Italian beef deserves a place in your cooking repertoire.

  1. Flavorful: The combination of beef, herbs, and a tangy sauce creates a depth of flavor that’s irresistible.
  2. Easy to Make: With just a few simple steps and minimal ingredients, you can have a restaurant-quality dish on the table in no time.
  3. Versatile: Serve it on rolls for classic sandwiches, or pair it with your favorite sides for a complete meal.

What You’ll Need

  • 3-4 lb beef roast (chuck or rump roast works well)
  • Italian dressing mix (or make your own with herbs and spices)
  • Beef broth or stock
  • Pepperoncini peppers
  • Hoagie rolls or crusty bread
  • Provolone cheese (optional)
  • Giardiniera (optional, for added flavor)

Step-by-Step Guide to Perfect Italian Beef

1. Prepare the Beef

Start by seasoning your beef roast with the Italian dressing mix. Make sure to coat the roast evenly on all sides. If you prefer to make your own seasoning, mix together dried oregano, basil, garlic powder, onion powder, salt, and pepper.

2. Slow Cook the Beef

Place the seasoned beef roast in your slow cooker. Add beef broth or stock, enough to cover about half of the roast. Throw in a handful of pepperoncini peppers for added flavor. Cover and cook on low for 8-10 hours or on high for 5-6 hours, until the beef is tender and easily shredded with a fork.

3. Shred and Serve

Once the beef is cooked, remove it from the slow cooker and shred it using two forks. Return the shredded beef to the slow cooker and mix it with the cooking liquid to ensure it’s well-coated in flavor. Serve the beef on hoagie rolls or crusty bread, topped with provolone cheese and giardiniera if desired.

Pro Tips for Perfect Italian Beef

  • Choose the Right Cut: Chuck or rump roast are ideal for their tenderness and flavor. Avoid leaner cuts that can become tough when slow-cooked.
  • Customize the Flavor: Feel free to adjust the seasoning to your taste. Add a pinch of red pepper flakes for heat, or a splash of red wine for extra depth of flavor.
  • Make Ahead: Italian beef is a great make-ahead dish. The flavors intensify overnight, making it even more delicious the next day.

Frequently Asked Questions

Q: Can I make Italian beef in the oven?

A: Yes! If you prefer to use the oven, sear the beef roast on the stovetop first, then transfer it to a Dutch oven or roasting pan. Add the broth, seasoning, and pepperoncini, then cover and cook at 325°F (165°C) for 3-4 hours, until tender.

Q: What can I serve with Italian beef?

A: Italian beef pairs well with a variety of sides. Serve it with a side salad, roasted vegetables, or even a hearty soup for a complete meal.

Q: Can I use a different type of beef?

A: While chuck or rump roast is traditional, you can use other cuts like brisket or even ground beef for a quicker version. Just adjust the cooking time accordingly.

Conclusion

Italian beef is a classic dish that’s as delicious as it is easy to make. With just a few simple ingredients and steps, you can create a restaurant-quality meal at home that will impress everyone at the table.

So, grab your slow cooker, gather your ingredients, and get ready to master the art of Italian beef. Your taste buds will thank you!

You May Also Like

No Results Found

The page you requested could not be found. Try refining your search, or use the navigation above to locate the post.
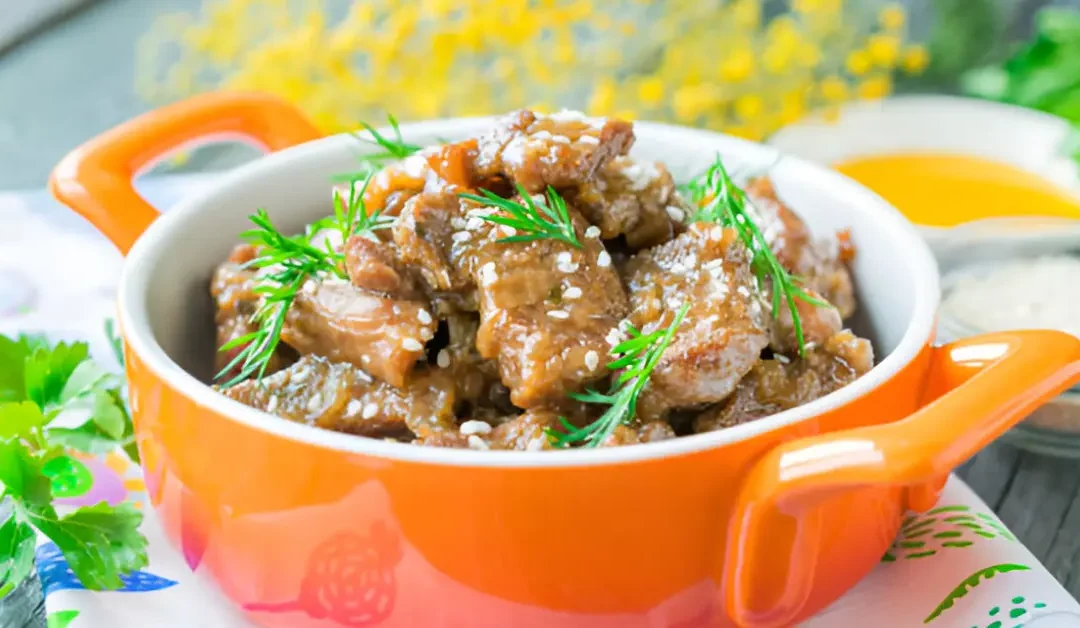
The Ultimate Easy Mongolian Beef Recipe Guide

The Ultimate Easy Mongolian Beef Recipe Guide

Picture this: tender, juicy strips of beef coated in a sticky, savory-sweet sauce, all cooked to perfection in just minutes. Sounds like a dream? Welcome to the world of easy Mongolian beef!

This classic dish is a favorite for a reason—it’s delicious, versatile, and surprisingly simple to make at home. Whether you’re a seasoned chef or a kitchen novice, this guide will walk you through creating the ultimate Mongolian beef that will impress your taste buds and your dinner guests. Let’s dive in!

Why Mongolian Beef?

Before we get into the recipe, let’s talk about why Mongolian beef deserves a place in your cooking repertoire.

  1. Flavorful: The combination of soy sauce, garlic, ginger, and a touch of sweetness creates a sauce that’s irresistibly delicious.
  2. Quick and Easy: With just a few simple steps and minimal ingredients, you can have a restaurant-quality dish on the table in no time.
  3. Versatile: Serve it over rice, noodles, or with your favorite vegetables for a complete meal.

What You’ll Need

  • 1 lb flank steak or beef strips
  • Cornstarch
  • Vegetable oil
  • Soy sauce
  • Brown sugar
  • Garlic
  • Ginger
  • Green onions (for garnish)
  • Sesame seeds (for garnish)

Step-by-Step Guide to Perfect Mongolian Beef

1. Prepare the Beef

Start by slicing your flank steak into thin strips against the grain. This ensures the beef stays tender. Toss the beef strips in cornstarch until evenly coated. This will help create a crispy exterior when cooked.

2. Make the Sauce

In a small bowl, whisk together soy sauce, brown sugar, minced garlic, grated ginger, and a bit of water. This will be your flavorful Mongolian beef sauce.

3. Cook the Beef

Heat a small amount of vegetable oil in a large skillet or wok over medium-high heat. Add the beef strips in a single layer and cook until browned on both sides, about 1-2 minutes per side. You may need to do this in batches to avoid overcrowding the pan.

4. Combine and Simmer

Once all the beef is cooked, return it to the skillet and pour the sauce over the top. Stir to coat the beef evenly and let it simmer for a few minutes until the sauce thickens.

5. Serve

Plate your Mongolian beef over steamed rice or noodles. Garnish with chopped green onions and sesame seeds for added flavor and presentation. Serve immediately and enjoy!

Pro Tips for Perfect Mongolian Beef

  • Use the Right Cut: Flank steak is ideal for its tenderness and flavor. If you can’t find flank steak, beef strips or even ground beef can work in a pinch.
  • Don’t Overcook: Mongolian beef is best when the beef is tender and juicy. Avoid overcooking to keep it from becoming tough.
  • Customize the Sauce: Feel free to adjust the sauce to your taste. Add a pinch of red pepper flakes for heat, or a splash of rice vinegar for extra tang.

Frequently Asked Questions

Q: Can I make Mongolian beef in a slow cooker?

A: While Mongolian beef is traditionally a quick stir-fry dish, you can adapt it for the slow cooker. Combine all the ingredients and let it cook on low for 6-8 hours. The beef will be incredibly tender, but the texture will be different from the stir-fried version.

Q: What can I serve with Mongolian beef?

A: Mongolian beef pairs well with a variety of sides. Steamed rice or noodles are classic choices, but you can also serve it with stir-fried vegetables, broccoli, or even a fresh salad.

Q: Can I use a different type of beef?

A: Yes! While flank steak is traditional, you can use other cuts like sirloin or even ground beef for a quicker version. Just adjust the cooking time accordingly.

Conclusion

Mongolian beef is a classic dish that’s as delicious as it is easy to make. With just a few simple ingredients and steps, you can create a restaurant-quality meal at home that will impress everyone at the table.

So, grab your wok, gather your ingredients, and get ready to master the art of Mongolian beef. Your taste buds will thank you!

You May Also Like

No Results Found

The page you requested could not be found. Try refining your search, or use the navigation above to locate the post.