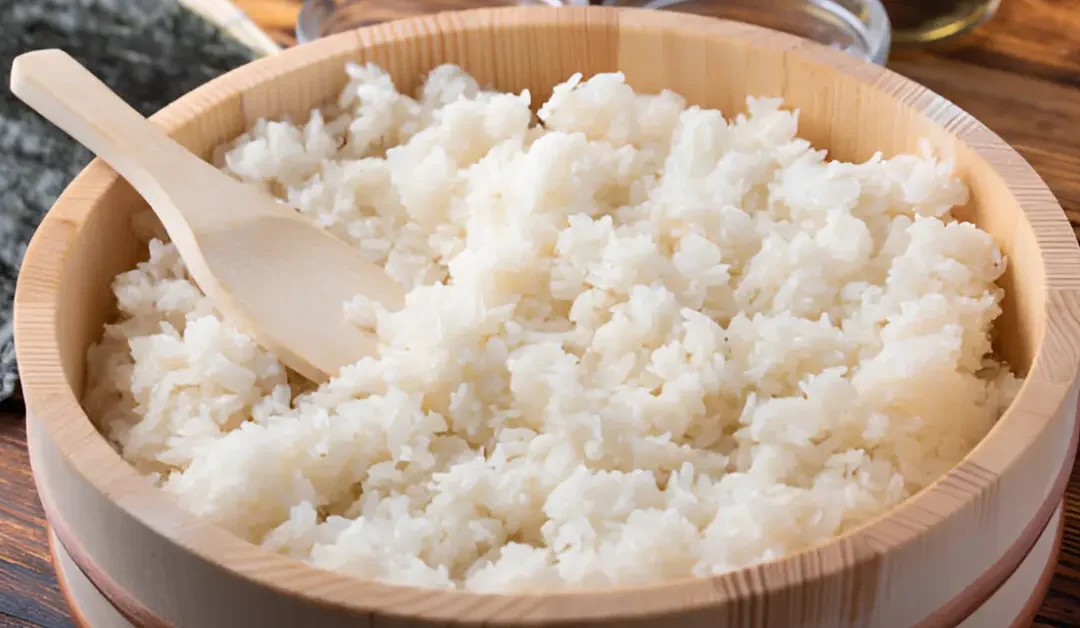
Ever wondered how to unlock the secret to restaurant-quality sushi rice right in your own kitchen? Forget complicated techniques and mysterious rituals – I’m about to show you how to make mind-blowingly delicious sushi rice using nothing more than your trusty rice cooker and a few simple ingredients.
Why Rice Cookers are a Sushi Rice Game-Changer
Let’s be real – making sushi rice can feel like performing culinary magic. But with a rice cooker, you’re about to transform from a nervous amateur to a sushi rice wizard. No more burnt bottoms, mushy middles, or rice that looks like it survived a kitchen disaster.
What Makes Sushi Rice Special?
Sushi rice isn’t just any old rice. It’s a specific type of short-grain Japanese rice (called shari or sumeshi) that’s sticky, slightly sweet, and has a magical ability to hold together perfectly. The secret? It’s all in the preparation.
Ingredients You’ll Need
Before we dive in, let’s talk supplies:
- Short-grain Japanese rice (Look for brands like Koshihikari or Calrose)
- Rice cooker (Your new best friend)
- Rice vinegar
- Sugar
- Salt
- Wooden or plastic rice paddle (Metal can damage your rice)
Step-by-Step Sushi Rice Perfection
1. Washing: The Most Crucial Step
Why Washing is Non-Negotiable
When you first look at uncooked rice, it might seem clean, but it’s actually covered in excess starch, dust, and sometimes even residual processing chemicals. Washing serves multiple critical purposes:
- Starch Removal: The white powdery coating on rice grains is pure starch. Washing removes this excess starch, which:
- Prevents the rice from becoming overly sticky
- Reduces the chances of a gummy, clumpy texture
- Helps each grain remain distinct and separate
- Cleanliness: Rinsing eliminates:
- Dust particles
- Potential agricultural residues
- Any lingering impurities from processing
Precise Washing Technique
Step-by-Step Breakdown:
- Select the Right Strainer: Use a fine-mesh strainer to prevent rice grains from slipping through.
- Water Temperature: Always use cold water – it’s gentler on the rice grains.
- Gentle Swirling:
- Place rice in strainer
- Run cold water over the rice
- Use your hand to create a gentle swirling motion
- This helps dislodge starch without breaking the grains
- Repeat Process:
- Drain water
- Repeat washing 3-4 times
- Stop when water becomes almost clear (slight cloudiness is okay)
2. Water Ratio: The Golden Rule
Why Sushi Rice is Different
Sushi rice requires a slightly different water approach compared to regular rice:
- Regular long-grain rice might need 1:2 rice to water ratio
- Sushi rice (short-grain) needs less water
- Goal: Sticky but not mushy texture
Precise Measurement
- Ideal Ratio: 1 cup rice to 1-1.1 cups water
- Pro Tip: Most rice cookers have built-in measuring lines
- Slightly less water ensures:
- Firm grain structure
- Perfect sticky consistency
- Ideal for forming sushi rolls
3. Cooking: Machine Magic
Hands-Off Approach
- Transfer washed rice directly into rice cooker
- Add precisely measured water
- Close lid securely
- Select “white rice” setting
- Press start
Post-Cooking Rest
- After cooking cycle completes, let rice sit 10-15 minutes
- Allows moisture to distribute evenly
- Helps achieve uniform texture
- Prevents rice from being too wet or dry
4. Flavor Transformation: Sushi Vinegar (Su)
Ingredient Breakdown
- Rice Vinegar: 1/4 cup
- Provides tangy, slightly sweet flavor
- Sugar: 2 tablespoons
- Balances vinegar’s acidity
- Adds subtle sweetness
- Salt: 1 teaspoon
- Enhances overall flavor profile
Mixing Technique
- Use a small bowl
- Whisk ingredients until sugar completely dissolves
- Ensure no granules remain
- Mixture should be smooth and well-integrated
5. The Final Touch: Seasoning
The Art of Folding
Think of this like a delicate dance with your rice:
- Tool Selection:
- Wooden paddle preferred
- Plastic acceptable
- Never use metal (can break rice grains)
Folding Technique
- Cut, Don’t Smash: Imagine you’re creating a soufflé
- Gentle Motion:
- Slice through rice
- Fold over gently
- Rotate bowl
- Cooling Trick:
- Use a fan or piece of cardboard
- Wave over rice while folding
- Adds glossy finish
- Helps cool rice to perfect temperature
Key Objectives
- Distribute vinegar evenly
- Cool rice
- Create glossy, separated grains
- Develop signature sushi rice flavor
Pro Chef Secret: The goal is a rice that’s sticky enough to hold together but not so sticky it becomes a paste. It should have individual grains that cling together just enough for sushi rolling.
Common Sushi Rice Mistakes to Avoid
❌ Don’t:
- Use cold rice
- Stir too aggressively
- Skip washing
- Use metal utensils
- Let rice sit too long after seasoning
✅ Do:
- Use rice immediately
- Keep rice covered with a damp towel
- Maintain gentle folding technique
- Taste and adjust seasoning
Troubleshooting Quick Reference
| Problem | Solution |
| Rice too dry | Add a tiny splash of water |
| Rice too wet | Next time, reduce water slightly |
| Not sticky enough | Ensure thorough washing |
| Lacks flavor | Adjust su (vinegar mix) to taste |
Final Thoughts: Your Sushi Rice Journey Begins
Congratulations! You’ve just learned the art of creating restaurant-quality sushi rice in your own kitchen. Remember, like any skill, practice makes perfect. Each batch will get better and better.


